Why should you consider changing your site from http to https?
Google has made changes to how Chrome displays pages showing a green icon to indicate if your site is being displayed securely. They also have started displaying alerts on pages that are insecure that have forms to indicate to your users if they the form is ‘Not Secure’. In addition to the alerts and icons displayed Google has also started giving better search rankings to sites that are using https. Most organizations are taking note of this and are taking measures to ensure their websites are secure.
What do you need to do to enable SSL (https) on your website?
To enable SSL you will require an SSL certificate which will ensure that your pages display a lock symbol in the address bar to indicate that your site is secure. Once you’ve enabled SSL you likely will also need to adjust the way your page is pulling in different elements such as images, videos, scripts etc so they are being pulled in securely. On plain HTML sites, there may be a lot of work involved because each page needs to be edited and reviewed individually. If your website uses WordPress there are several steps you can take to properly set your server and site to be ready for https. The following is the proceedure we take to enable SSL on our client’s WordPress websites:
 Make sure you have an SSL certificate installed on your web hosting. All of the hosting plans we provide come with free SSL certificates included at no charge. However, if you are running a shopping cart or accepting sensitive data on your site, you might wish to consider purchasing an SSL certificate. We do offer certificates from all major suppliers. Just let us know what your needs are and we can make a recommendation. You can either install a certificate yourself via Cpanel,or if you purchase the certificate through us, we will install it for you. We offer certificates at below posted retail prices.
Click here for more information. You will need to make a backup of your database before you make any other changes. This is relatively simple. You can login to Cpanel and backup your database via the BACKUP icon.
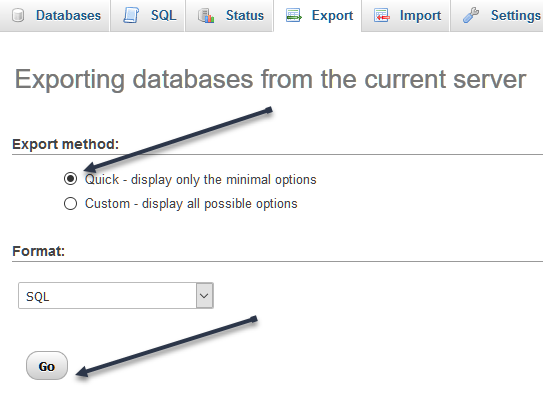
We prefer to make a backup using phpMyAdmin. Click the phpMyAdmin icon inside your Cpanel. Select your database, go to Export and click ‘Go’ to export using the Quick Export Method. More info here.

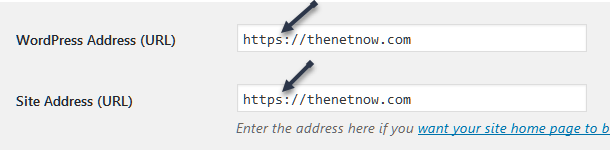
- Next, login to your WordPress admin and change both the WordPress Address (URL) and the Site Address (URL) under Settings -> General. Simply change where it says http:// to https:// in your address.
- Next, install a plugin in wordpress called “Better Search and Replace”. You will use it to do a replacement for all of your domain names. For example, replace http://yourdomainname.com with https://yourdomainname.com. https://en-ca.wordpress.org/plugins/better-search-replace/
- You will then want to be sure your site always forces a user to the secure version including the https. To do this, update your .htaccess file as follows. Look for the line that says # BEGIN WordPress and add it below. If you already have RewriteEngine On, leave out that line and add others immediately below.
RewriteEngine On
RewriteCond %{HTTPS} off
RewriteRule ^(.*)$ https://%{HTTP_HOST}%{REQUEST_URI} [L,R=301] - If you are not comfortable making changes as described above, you may be able to handle all this via a plugin like https://wordpress.org/plugins/https-redirection/
- We recommend checking your site in the Chrome browser as it has the most strict standards on https. We also recommend testing all pages of your website as for instance an image may be brought up insecurely on one page and not another. If you see there is no padlock shown in the address bar, then the browser does not see your site as fully https compliant. You can use this website to help you discover why: https://www.whynopadlock.com While testing you may need to clear browser cache to see up to date results (ctrl and F5).
- You can/should also look at the Page Source Code (right click on page, select View Source). Do a search on the source code for anything with http:// to ensure that you have found and replaced all instances to https://.
There are many sites offering similar suggestions. You might want to also take a look at some others.
https://developers.google.com/web/fundamentals/security/encrypt-in-transit/why-https
https://developers.google.com/web/updates/2016/10/avoid-not-secure-warn
http://www.wpbeginner.com/wp-tutorials/how-to-add-ssl-and-https-in-wordpress/